Last night I decided I wanted to try out making my own stop motion animation, using the Playmobil people that I had used in my previous rayograms. As this was my first attempt on my on, I thought I would keep it simple and short. The story line is the same, the boy gives the girl a flower. I took about 40 photos for this 2 and a half second animation.
I quite like this even though it is SUPER short. :)
I also had a tiny bit of trouble with getting my camera to focus on the figures not the background, so it was hard to keep the camera in EXACTLY the same position, as I had to shift it slightly to get it to take the photo at all! Although I do kinda like the slightly jumpiness of it. It could of bin a lot worse!
Maybe doing a stop motion would be better than a cel animation? Taking photos is quicker than drawing out each frame...
Saturday, 9 April 2011

Friday, 8 April 2011
After Affects Workshops..
We have now had two After Affects workshops. The first one we were just shown how to import images ect and put them in the sequence for an animation. We were also shown how to import music into it and some other basics.
In the second workshop we were showed how to edit and adjust images ect while in After Affects. Johnny got us to open and image of a paper star/flower type shape, and in Photoshop first we cut out around it, and also around a smaller shape from the middle of the star, so we had two similar shapes, but different sizes.
Then we imported those images into After Affects, and he showed us how to animate the shape so that it moves from the middle off the side. He also showed us how to make it spin, and then how to 'attach' the smaller shape to the bigger one, something called 'parenting'. Basically the big shape is the parent, and the small shape is the child, when they are linked, the small shape will follow the movement of the bigger shape.
I think I understand the basics of After Affects now, although I find it a bit hard to follow when the tutor is going through things quite fast to a whole group, I prefer to learn while doing, by myself or with one person to help me.. So I think with the basics I will be ok using After Affects to compile my animation.
This is my 'test' from today's workshop. It's actually all over within a second, and looks like it is nothing really, it does show that I learned how to make the shape move off the page and also change in size slightly. The rest however I must not of had selected while saving, as it is not showing the other sequence of images that I put on after the shape disappears off the side. OOOPS.
I do feel more confident with After Affects after these workshops, as before them I had never used it before.
In the second workshop we were showed how to edit and adjust images ect while in After Affects. Johnny got us to open and image of a paper star/flower type shape, and in Photoshop first we cut out around it, and also around a smaller shape from the middle of the star, so we had two similar shapes, but different sizes.
Then we imported those images into After Affects, and he showed us how to animate the shape so that it moves from the middle off the side. He also showed us how to make it spin, and then how to 'attach' the smaller shape to the bigger one, something called 'parenting'. Basically the big shape is the parent, and the small shape is the child, when they are linked, the small shape will follow the movement of the bigger shape.
I think I understand the basics of After Affects now, although I find it a bit hard to follow when the tutor is going through things quite fast to a whole group, I prefer to learn while doing, by myself or with one person to help me.. So I think with the basics I will be ok using After Affects to compile my animation.
This is my 'test' from today's workshop. It's actually all over within a second, and looks like it is nothing really, it does show that I learned how to make the shape move off the page and also change in size slightly. The rest however I must not of had selected while saving, as it is not showing the other sequence of images that I put on after the shape disappears off the side. OOOPS.
I do feel more confident with After Affects after these workshops, as before them I had never used it before.
Thursday, 7 April 2011
STORYBOARDING.
A storyboard is a series of illustrations or sketches displayed in the sequence that is intended for pre-visualising a motion picture. Here is an example:


This is a storyboard for The Simpsons. Making a storyboard will help me plan out my animation shot by shot, and allow me to make changes to it before I start the actual production of it.

Here is another example of a storyboard. The sketches can we stick figures, as this is just to get an idea of how the animation will flow and work before making it, to make sure that it is good before wasting time producing it.

The idea is that you draw a still of what will be happening in the frame, and then write underneath it for camera actions or any audio that will happening in that scene.
I need to come up with a storyboard for my animation before I start to make it.
Wednesday, 6 April 2011
Cel Animation Workshop
We had a Cel animation workshop to show us another way of creating an animation. Cel animation, also referred to as hand-drawn animation, is the oldest and historically the most popular form of animation. Traditionally a cartoon is drawn frame by frame by hand.This is the method that people such as Matt Groening use for the cartoon series The Simpsons and Furturama.
The Simpsons is one of the most watched cartoons, created by Matt Groening and produced by James L.Brooks, and is also among my most watched tv programs.. along with...
... Futurama! Also on my list. And also created by Matt Groening. They have teams of animators who draw all the frames, called 'tweens' that go in between all the main frames which are drawn by a main animator. This method is extremely tedious and time consuming. Mike Scully says that it takes 9months from starting to work on a script until the show airs. They have a team of 15-16 writers and they are usually working on 7-8 different 20 minute episodes at one time. That's a long time.
To start our session, we we're told to just start drawing out a few characters:

Then we had to chose one that we liked, and draw it from different angles.. I chose to do my triangle man..

I decided to call him TRI-MAN. I drew him from the front, the back, and left side and the right.

Then we had to join with someone else and put our characters together to create a story in which they both appear. We did a story line, seen above. This is just the idea of the start the middle and the ending of a story. I paired up with Lewis and his OCTO-MAN, and our story is that Octo-man has invaded Tri-man's turf and is selling drugs to his clients. Tri-man is not happy about this at all, so our animations shows him looking for Octo-man, he finds him and then shoots him BANG and Octo-man is dead. The End.
The Simpsons is one of the most watched cartoons, created by Matt Groening and produced by James L.Brooks, and is also among my most watched tv programs.. along with...
... Futurama! Also on my list. And also created by Matt Groening. They have teams of animators who draw all the frames, called 'tweens' that go in between all the main frames which are drawn by a main animator. This method is extremely tedious and time consuming. Mike Scully says that it takes 9months from starting to work on a script until the show airs. They have a team of 15-16 writers and they are usually working on 7-8 different 20 minute episodes at one time. That's a long time.
To start our session, we we're told to just start drawing out a few characters:

Then we had to chose one that we liked, and draw it from different angles.. I chose to do my triangle man..

I decided to call him TRI-MAN. I drew him from the front, the back, and left side and the right.

Then we had to join with someone else and put our characters together to create a story in which they both appear. We did a story line, seen above. This is just the idea of the start the middle and the ending of a story. I paired up with Lewis and his OCTO-MAN, and our story is that Octo-man has invaded Tri-man's turf and is selling drugs to his clients. Tri-man is not happy about this at all, so our animations shows him looking for Octo-man, he finds him and then shoots him BANG and Octo-man is dead. The End.
Starting to draw a bit...
I have started to draw some drums, in the style which I am thinking to use for my animation.
My idea at the moment is to use continuous line drawings, and for the drawings to come alive in my animation, like the image unfolds before our eyes, as if it is being draw but we can't see a pen or a hand drawing it.

Firstly I did some continuous line drawings of the Bongos.. also starting to think about how it would come together if the line came in from one side of the 'frame' to make the drums and then leave the other side.. or continue onto another drawing.
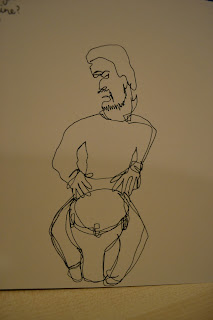
I also did this slightly blind, continuous line drawing of my dad playing the drum, I want to line to be waving, not perfect, and maybe even loopy and overlapping something and repeating itself. Maybe so it's a closer representation of how people really draw?
I HAVE A LOT MORE DRAWING TO DO!
My idea at the moment is to use continuous line drawings, and for the drawings to come alive in my animation, like the image unfolds before our eyes, as if it is being draw but we can't see a pen or a hand drawing it.

Firstly I did some continuous line drawings of the Bongos.. also starting to think about how it would come together if the line came in from one side of the 'frame' to make the drums and then leave the other side.. or continue onto another drawing.

I HAVE A LOT MORE DRAWING TO DO!
Drum Animations..
I looked on YouTube for other animations that people have done already, to get a bit of inspiration and to see how other people have approached using drums in an animation so I don't do mine the same as well.
This one caught my eye first because it looked so simple..
Now obviously these are not the same kind of drums I am working with, but it's still an example of how someone else has made an animations with drums along to a beat. I really like the simplicity of the lines coming off each drum when he hits it to indicate the sound. This is maybe something I could also use in mine if I wanted to indicate that the drum is being hit and making the sound that you are hearing?
Then I came across this one, which is very different. For a start is it clearly computer generated. I like how the animator has managed to get the figures hitting the drums with their heads just at the right times. This is a good example of getting the animation to go in time with a piece of music.
I have put this video up too, because there is a bit at 36 seconds onwards that I like the technique of. It is basically done the same kind of way I would like to try and do my own.. with drawn line appearing. The rest of this video is a bit weird, but also still another example of how someone else has made an animation for a song.
This one caught my eye first because it looked so simple..
Now obviously these are not the same kind of drums I am working with, but it's still an example of how someone else has made an animations with drums along to a beat. I really like the simplicity of the lines coming off each drum when he hits it to indicate the sound. This is maybe something I could also use in mine if I wanted to indicate that the drum is being hit and making the sound that you are hearing?
Then I came across this one, which is very different. For a start is it clearly computer generated. I like how the animator has managed to get the figures hitting the drums with their heads just at the right times. This is a good example of getting the animation to go in time with a piece of music.
I have put this video up too, because there is a bit at 36 seconds onwards that I like the technique of. It is basically done the same kind of way I would like to try and do my own.. with drawn line appearing. The rest of this video is a bit weird, but also still another example of how someone else has made an animation for a song.
Tuesday, 5 April 2011
RAYOGRAMS part two...
Today we didn't have a session as such, but the dark room was booked for us ALL DAY to go in and do some more rayograms if we so wish.. and I did! I still had a lot of paper left so I went nuts and did loads!
But first I thought I would try out actually using this rayograms to start looking at putting together an animation.. I just used a couple of playmobil people...


This is without all the little movements in between, it is just the story line. Basic. Boy gives girl a flower. For some reason the first one looks slightly darker black than the other two, although I think this is probably to do with exposure time, as I did play about changing the time with a few of my photos.

The pens look good, like an x-ray, because the plastic was quite clear it let the light through a lot more!


I like this one as it's like the hand is saying STOP! It's good that it's bold, I used a 20 second exposure for this I think, that's why the black is so dark and the line is so crisp.


I really like how this little tape has come out too.. it's a lot more like an x-ray than the others.


I really how the detail of the feather has come out, that's why I used it in a few, to see if I could play around with it a bit more.

I wanted to see what it would look like as a sort of background, and how well an object on top of it would come out. The lines on the keys aren't that sharp, but I still like the image anyway.

This is my keys, with a key ring that a friend made it, it's a strawberry teapot! and I love how it has come out so well!


I LOVE this one.. not only do I love the feather, but look at how the bobbles on the fanta bottle have come out! It's like when the line shined through the plastic it gave off a strange type of shadow that has made the bottle look AWESOME. What would glass look like?
But first I thought I would try out actually using this rayograms to start looking at putting together an animation.. I just used a couple of playmobil people...


This is without all the little movements in between, it is just the story line. Basic. Boy gives girl a flower. For some reason the first one looks slightly darker black than the other two, although I think this is probably to do with exposure time, as I did play about changing the time with a few of my photos.

The pens look good, like an x-ray, because the plastic was quite clear it let the light through a lot more!


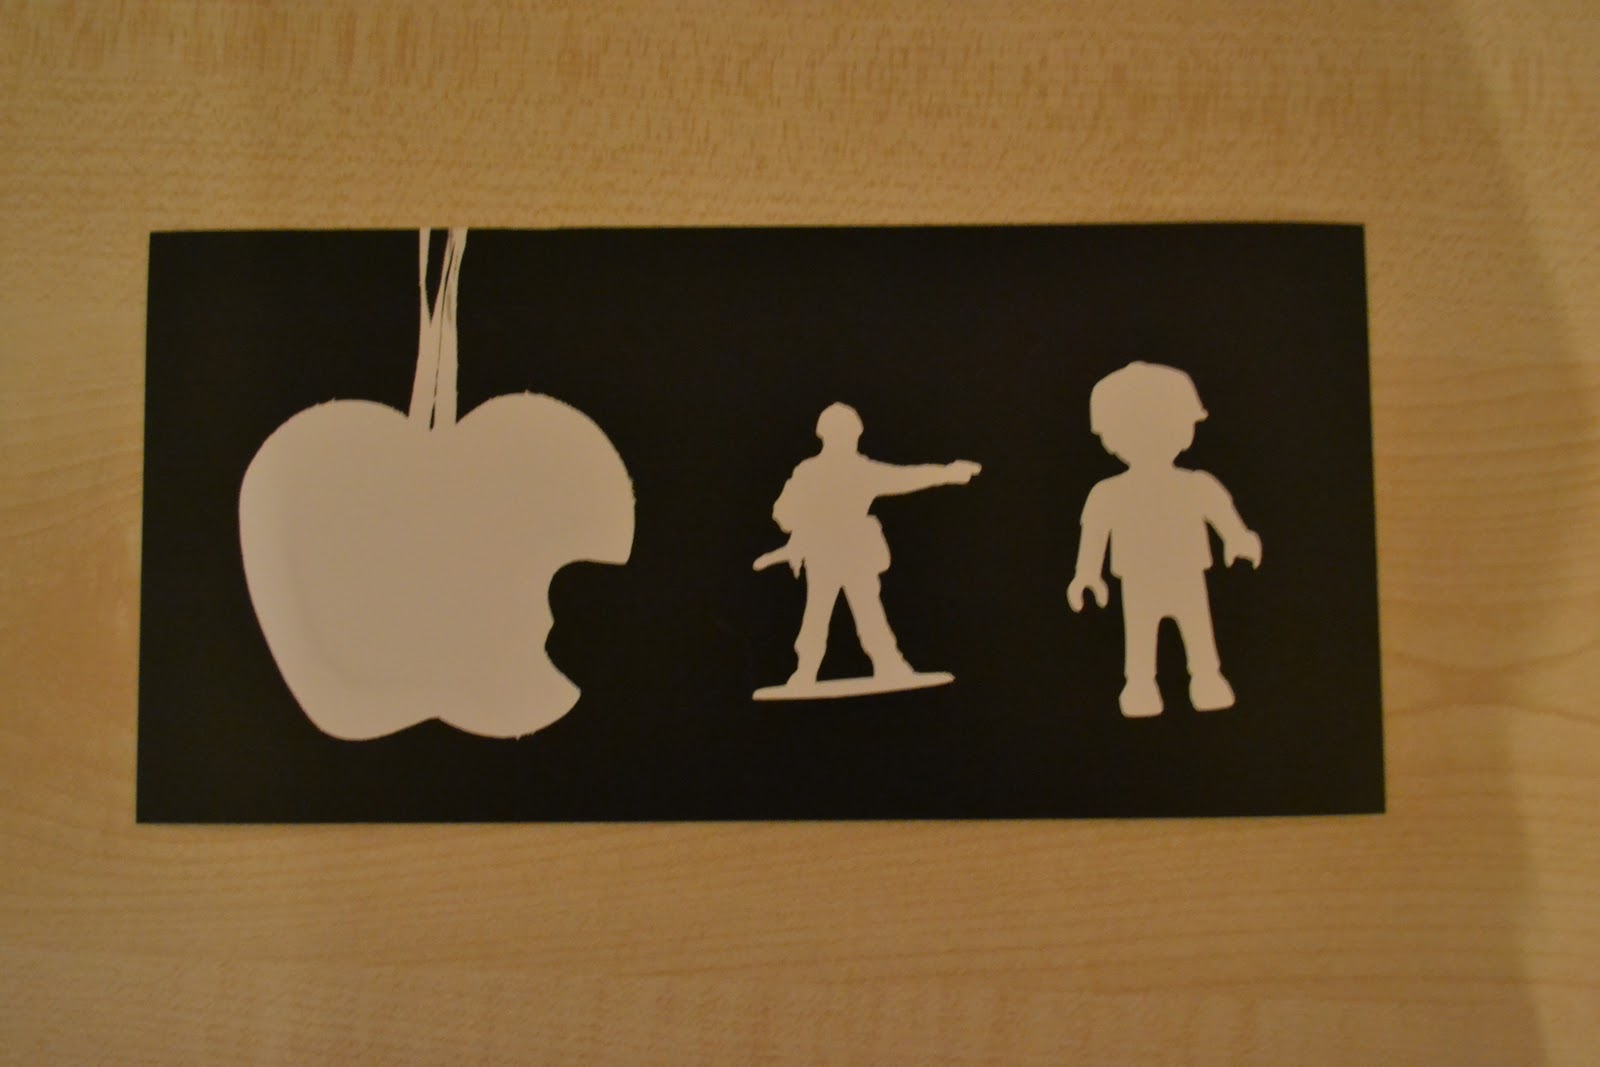

I like this one as it's like the hand is saying STOP! It's good that it's bold, I used a 20 second exposure for this I think, that's why the black is so dark and the line is so crisp.


I really like how this little tape has come out too.. it's a lot more like an x-ray than the others.


I really how the detail of the feather has come out, that's why I used it in a few, to see if I could play around with it a bit more.

I wanted to see what it would look like as a sort of background, and how well an object on top of it would come out. The lines on the keys aren't that sharp, but I still like the image anyway.

This is my keys, with a key ring that a friend made it, it's a strawberry teapot! and I love how it has come out so well!


I LOVE this one.. not only do I love the feather, but look at how the bobbles on the fanta bottle have come out! It's like when the line shined through the plastic it gave off a strange type of shadow that has made the bottle look AWESOME. What would glass look like?
Subscribe to:
Posts (Atom)