
This is the skeleton that we are working with. We made him move his head, and wave using his arms and his hands! For this first one, the skeleton was a Photoshop file, with the layers still available, so each limb was a separate layer..
..So to start with, we had to pair up all the 'parents' to their 'children', for example the torso is the parent to the upper arms, the head, and the upper legs.. then the upper leg is parent to the lower leg and the lower leg is parent to the foot.. This basically just means that they are attached, so when I move the leg from the top, the whole leg will move, not just the upper part.


Select 'torso', move the yellow time line to 2s or so, then drop a key frame on the rotation line, and move which ever part of the skeleton, in this I moved the head a few times, and the arm and the hand.
This is what it looked like after! It's a bit slow but I wanted to see what it was like. We were able to make him move, like a puppet.
Then Johnny showed us another way of making him move, that is more 'bendy' and free. For this one, we opened the skeleton as a PNG file, so it had been flatten meaning all the body parts are attached and in the same layer.

For this one, we used the 'puppet pin tool', and clicked to make a point at all the joints, but including the top of the head, and the kneck ect as well as like arms and legs.


This way allows the actual bones to seem like they are bending and curving as well as moving at the joint. You can change it as much as you want and get all sorts of different outcomes and techniques.
This was just a quick little test of what it could do, you can tell that it moves a lot differently to the first one. Depending on what effect you want, either one works great.
THEN he showed us how to make a line look like its appearing as it's being drawn.. WHICH IS WHAT MY ANIMATION WILL BE LIKE! So this was VERY helpful! Although slightly confusing too...

So first we opened up this file, then Layer > New > Solid, to open up another layer on top of this.

We made it a colour so we could see it, and then changed the opacity so that we could see the line in the layer underneath.

Then just using the Pen tool, we drew a line over the top of the line, following it exactly...

Then in the top menu we went Effect > Generate > Stroke. This opens another different menu of options at the side, which allow us to change the colour of the line, and the brush size and hardness, and also the opacity, and where is starts and ends.
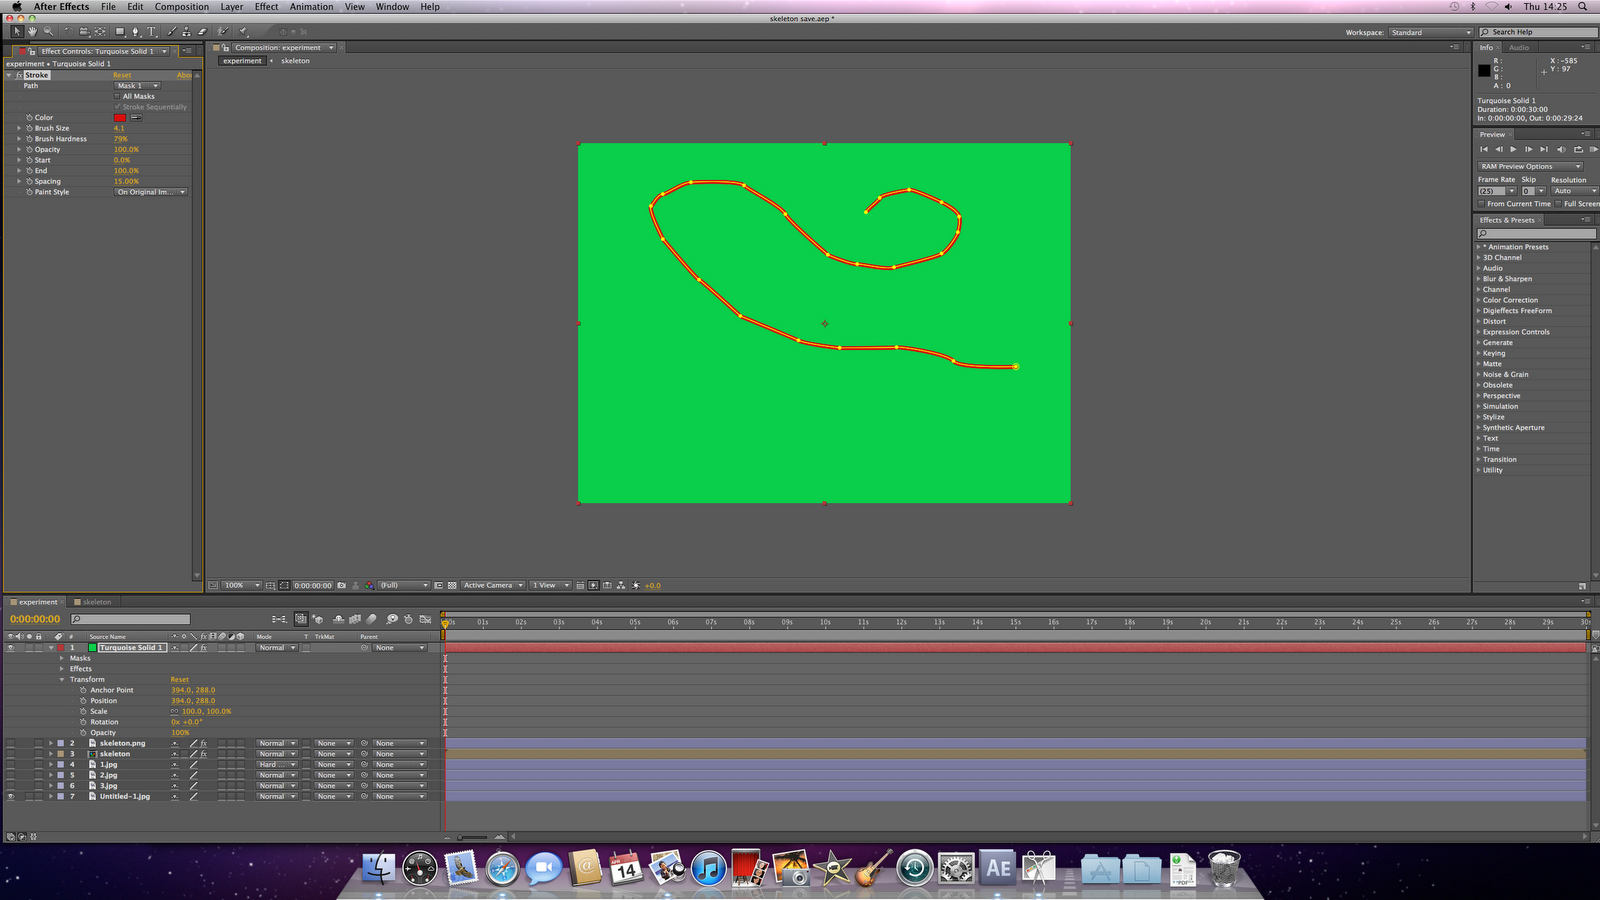
So I changed the colour of my stroke to RED so it stood out more...

... and then changed the start time, so that when it starts the line is visible fully, but as it runs through, the line starts to disappear :

Then I changed the colour of the line to white, so it's the same as the background of the streak that we started off with on the first layer, so that when the streak that I drew starts to go, the line underneath starts to appear... giving it the illusion that it's being drawn out in front of us.
And then this is how it looked! Although extremely simple and not quite perfect, I now feel that I could make an attempt with some of my drawings maybe? As this might be how I end up putting my hole animation together...
This one was also another really simple thing. Johnny showed us that if we just drew a shape, in this case a star, we could make it move around the page in real time however we wanted it to.

First you have to draw the shape, then at the top right, where is says 'workspace', change it to 'Animation', and then again, more options appear at the side. One is called 'Motion Sketch', and with this you can change the timing, so it will either be the time you move it as, or you can slow it down or speed it up..
Basically you click on 'Start Capture' and then click on your shape, holding click down you can then move the shape around the page with your mouse, making it follow what ever path you wish... Then when you're done, the shape will follow the path that you created for it... Like so:
I think this is really good to know, for time when you just want something to move across the page for example, or to follow the path around another shape or image in your animation. I may not need this for my own animation this time, but it's certainly helpful to know this for the future.
Ok, and now this is the last thing we did in this workshop... as we did cram a lot into one session! Masking...

So we opened up this photograph along with 2 other ones which are on layers underneath this image at the moment.

Using the Pen tool, we just drew a random shape, and cut away the rest, only leaving this section of the image...

Then in the options that open up from the toggle in the bottom window menu, you see an option called 'Mask', which opens up more options of things you can change.. You can do things like feather out the edges and change the opacity of the image..

.. Which is what I did.. I made it more transparent so that we would be able to see the other image slightly through it..

You can also change the appearance of the image with these other options on this drop out menu (seen above) I changed mine to 'Hard Mix', which has changed the colours of the top layer image slightly.. making it more visible I think.
The animation made from this basically shows the smaller section of image 'feathering' out, and also the colours changing into 'hard mix'.. but there must of bin a problem when I saved it, that I didn't notice at the time, so I do not have it.
No comments:
Post a Comment